There are two ways to connect the ends of a belt; lacing and splicing. In this article, we are going to discuss the differences between the kinds of splices. Splicing is the process of connecting the ends of the belts to make the belt “endless.” A belt being endless is important for several reasons. The biggest reason is that a spliced belt is stronger and has less of a chance of failure. The lacing will always be the weakest point on the belt. Another example, in the printing industry, is that you need a smooth surface so that the belt does not catch the paper. One last example is in the food industry. No one wants lacing to break off into their food.
When it comes to splicing, what kind of splice that is done all depends on the material that is being used. To be able to finger splice something the material needs to have the ability to be remelted. Polyester fabric, PVC, and tempered polyurethane are great examples of materials that can be remelted. Nylon, CURED rubber, and leather are three materials that will burn (instead of melt) and require a skive splice. Additionally, any splice can be reinforced with stitching.
Finger Splicing
Finger splicing is done by cutting identical fingers on each end of the belt. They are then inserted into each other and “cooked” to where the belt is connected. The benefits of this kind of splice is that it does not require any adhesive or previous training to do the splice. The fingers can be cut with a single action cutter (examples of nitta and habasit cutters for finger splices). These fingers are then inserted into a press that can be pre-programmed for specific temperatures and times. Finger splicing requires enough time for the belt to go up to temperature and then come back down. With that being said, this process can take up to an hour and a half and is generally a longer process than skive splicing.
Skive Splicing
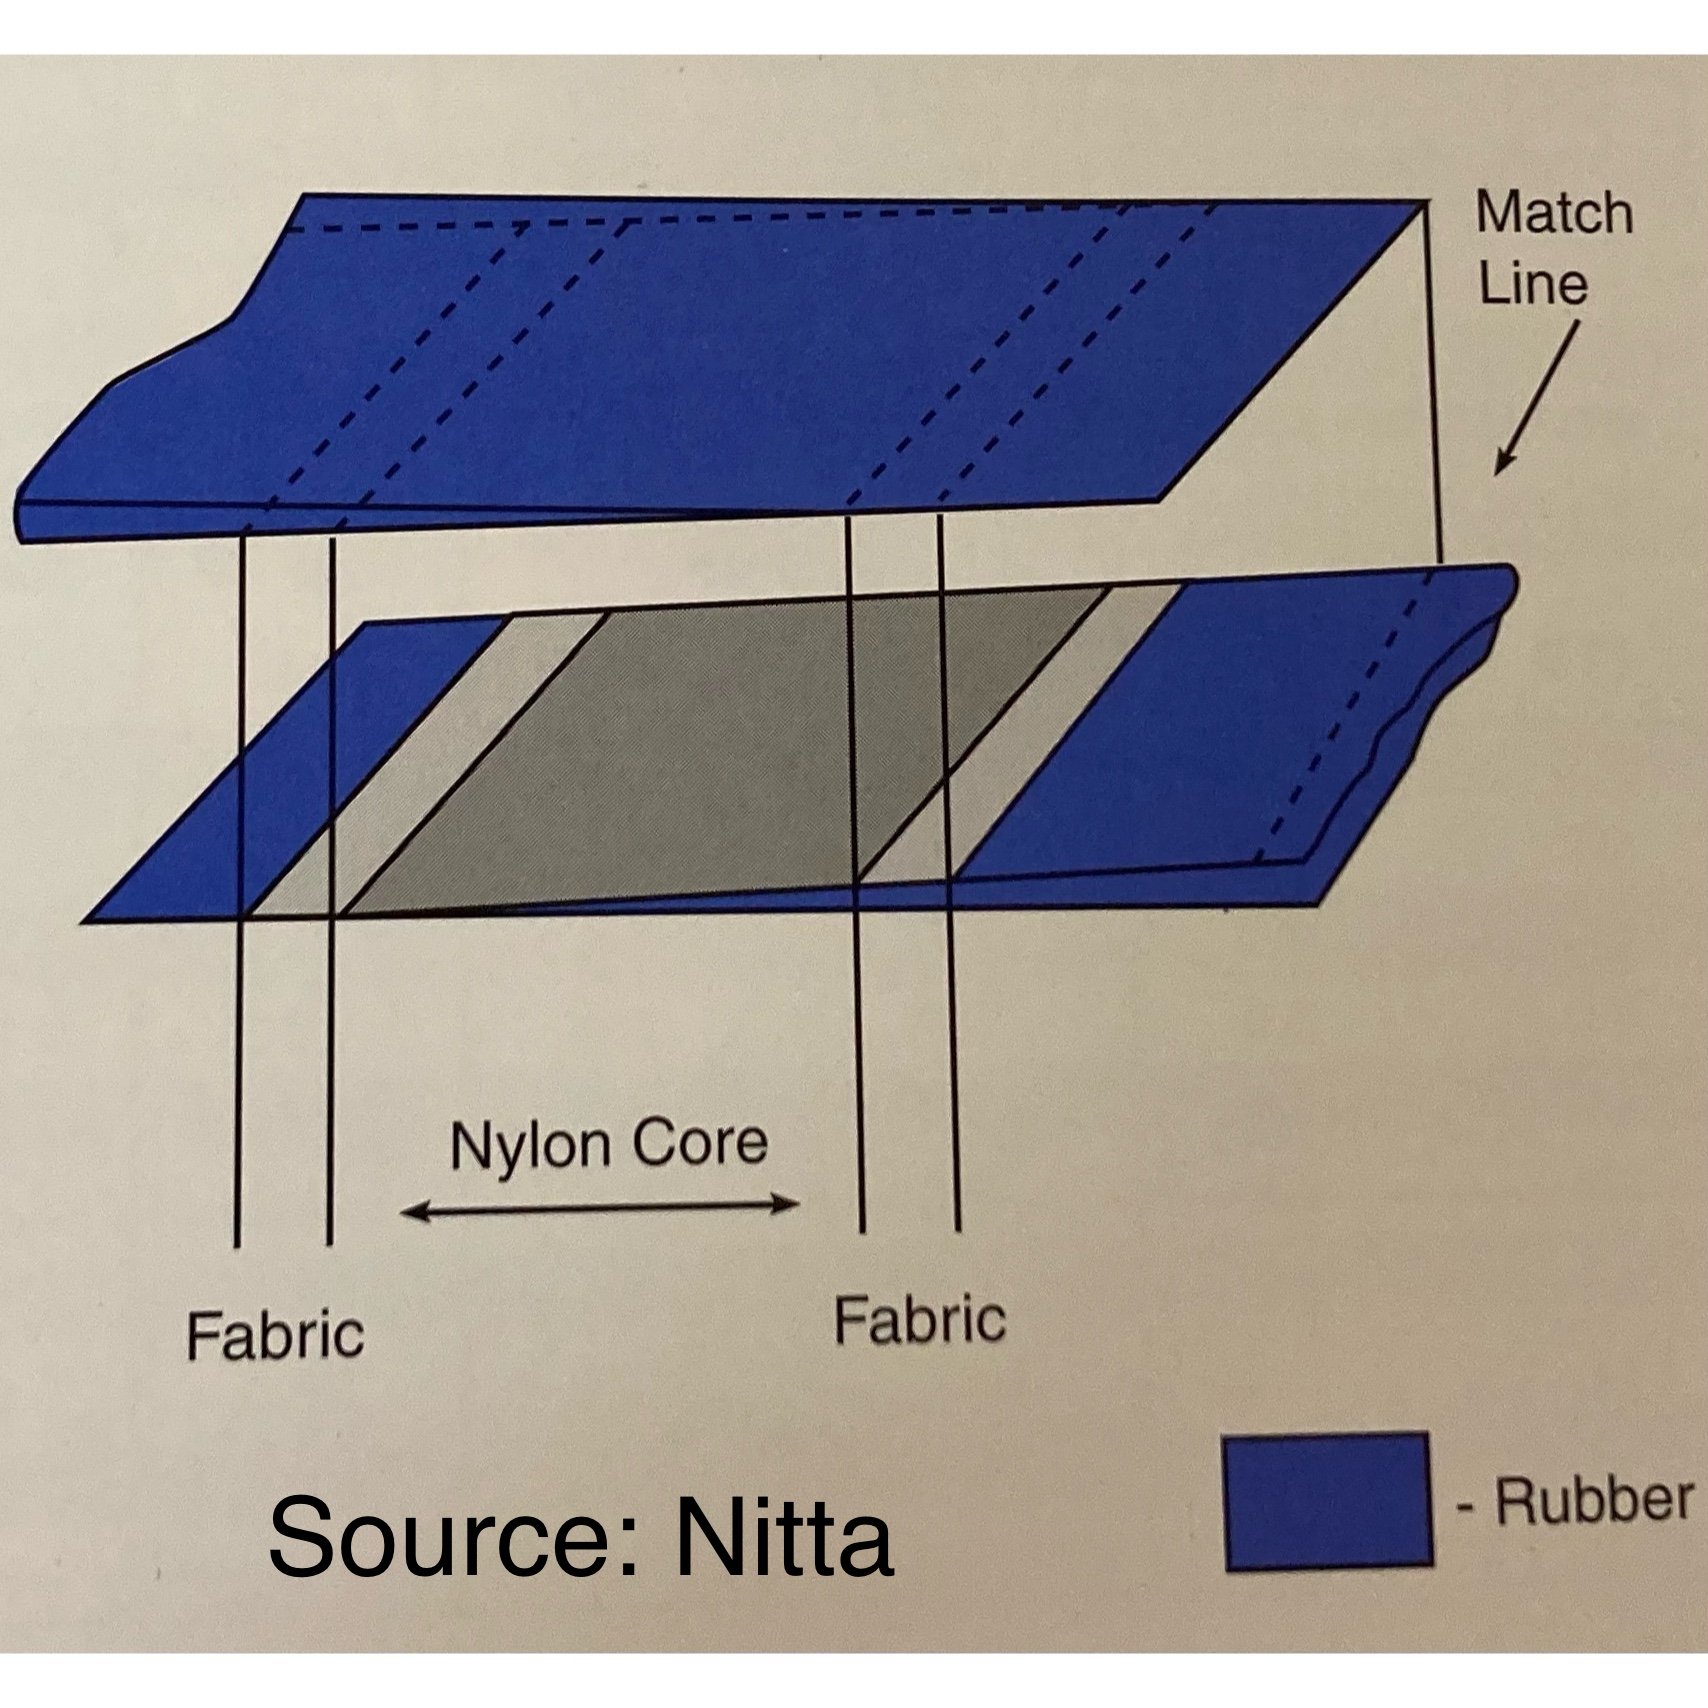
Every skive is different depending on the belt cover type. Differences in covers cause the type the binders, cooking temperatures, cook times, and skive lengths to be different. Skive lengths can range from 15-178mm, cooking temperatures range from 65-110°C, and cook times range from 4 minutes (for tapes) all the way to 40 minutes. Manufacturers and distributors will provide information on these factors in regards to your material when requested.
Skiving the belt can be done may ways. Disc skivers, rotary skivers, diamond skivers, and drum/band sanders can all be used to make the skives. A 30° angle is preferred for diagonal skives. However the angle of the skive is usually determined by; the width of the belt, length of the skive, and the platen size of the belt press being used. There are three important things to keep in mind during this part of the process so that you do not ruin the integrity of the belt. First, make sure that the skived faces of the nylon core are identical. The belt will not work if you try to bond two different materials. Second, make sure that the belts are square. The belt will lose strength if you have a “dog leg” hanging off. Lastly, make sure that the angles are as close to identical as possible. If not, it will lead to the cores not matching and raised parts of the belt that will present an issue when running.
Each material will also have their own binders. These binders do one of two things. Certain binders break down the chemical structure of the belt and allow it to bond together. Due to the fact that the binder is allowing the nylon core to bond together makes this a stronger splice. Finger splicing is the weaker splice because the core will always be separated a the splice .Other binders, like the one for leather, acts like glue.
Belts With Multiple Plies
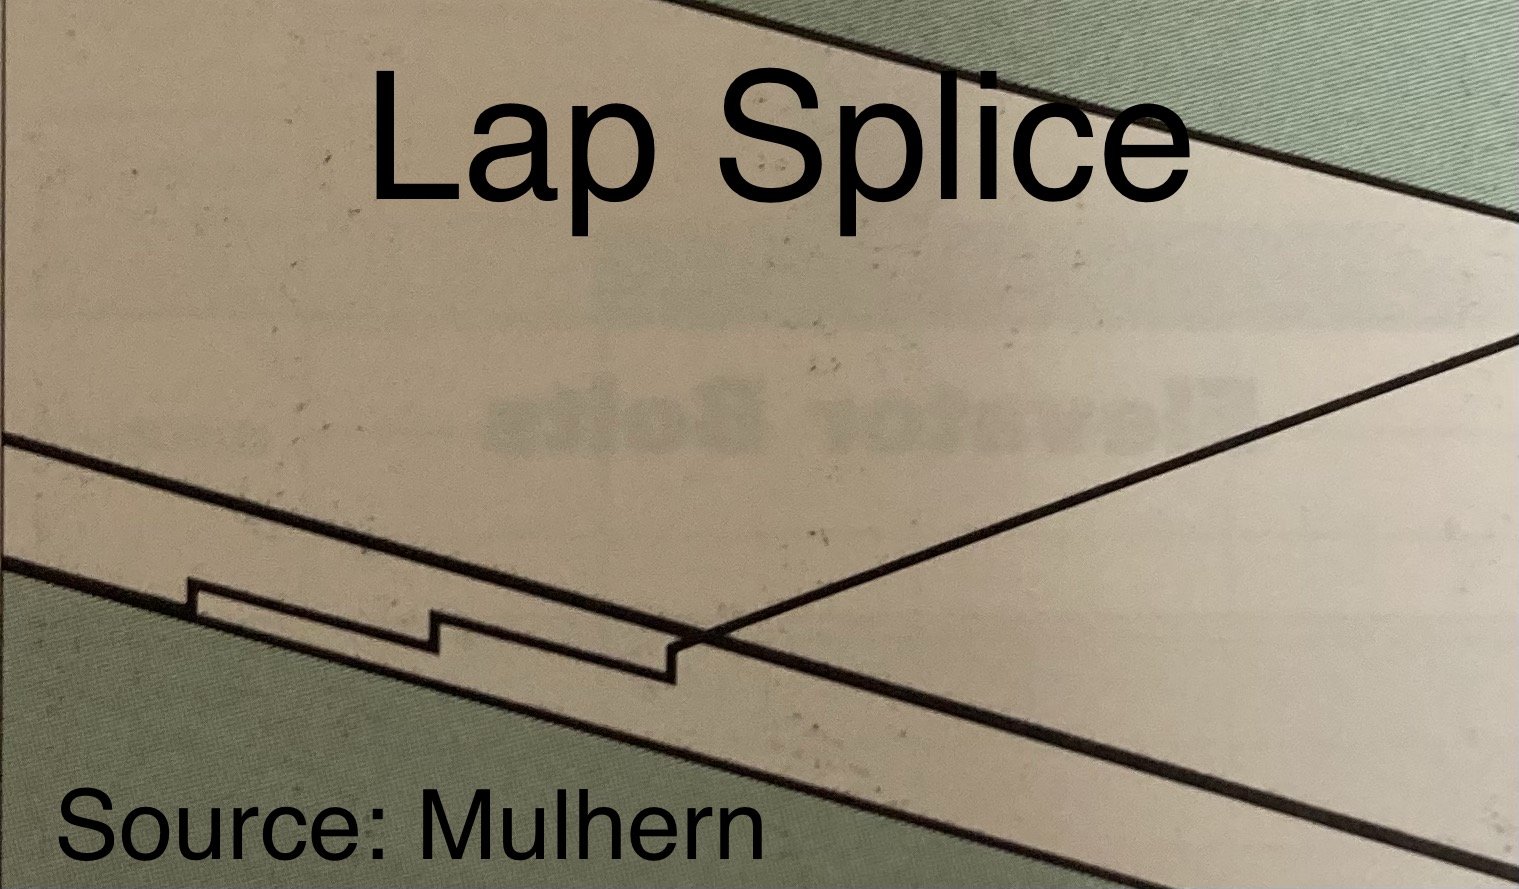
Similar to a skive splice. There are lap splice belts. These are used on belts with multiple plies. Instead of using binders, these belt used uncured rubber or thermoplastic as the bonding agent. These belts come out as strong as the original belt and are used in food applications. In situations where small pulleys are being used or additional strength is needed, a double finger splice may be the correct option. This is similar to a normal finger splice however each ply has its own fingers cut out.
Ending Thoughts
Determining which splice is best for you should be one of the last things when it comes to selecting a belt. First, determine the belt that needs to be used. This process starts with determining the conditions; operating conditions (inertia, pulley diameter, center distance, etc.), environments (atmosphere, ambient temperature, rays), performance (elongation rate, rubber material, mass, antistatic properties, etc.), and installation conditions. From there you can determine which belt structure is needed and then use that to find the perfect splice for you.


